Let’s start at the beginning: Each event has one or more sessions, and each session has one or more dates.
After each date, you can manage attendance per date. Once all dates have passed, you can manage the completion status for the entire session.

You can manage attendance for each date once that date has passed. Although it’s not mandatory, we recommend filling in the correct status. If no action is taken, “Attendance not confirmed” will appear in all event-related reports.
There are two options to confirm the attendance of participants in internal events.
Option 1 (via the LMS):
Under Sessions, you will find all sessions that are scheduled, completed, or closed. You can register attendance in two ways: at individual date or session level.
At the date level:
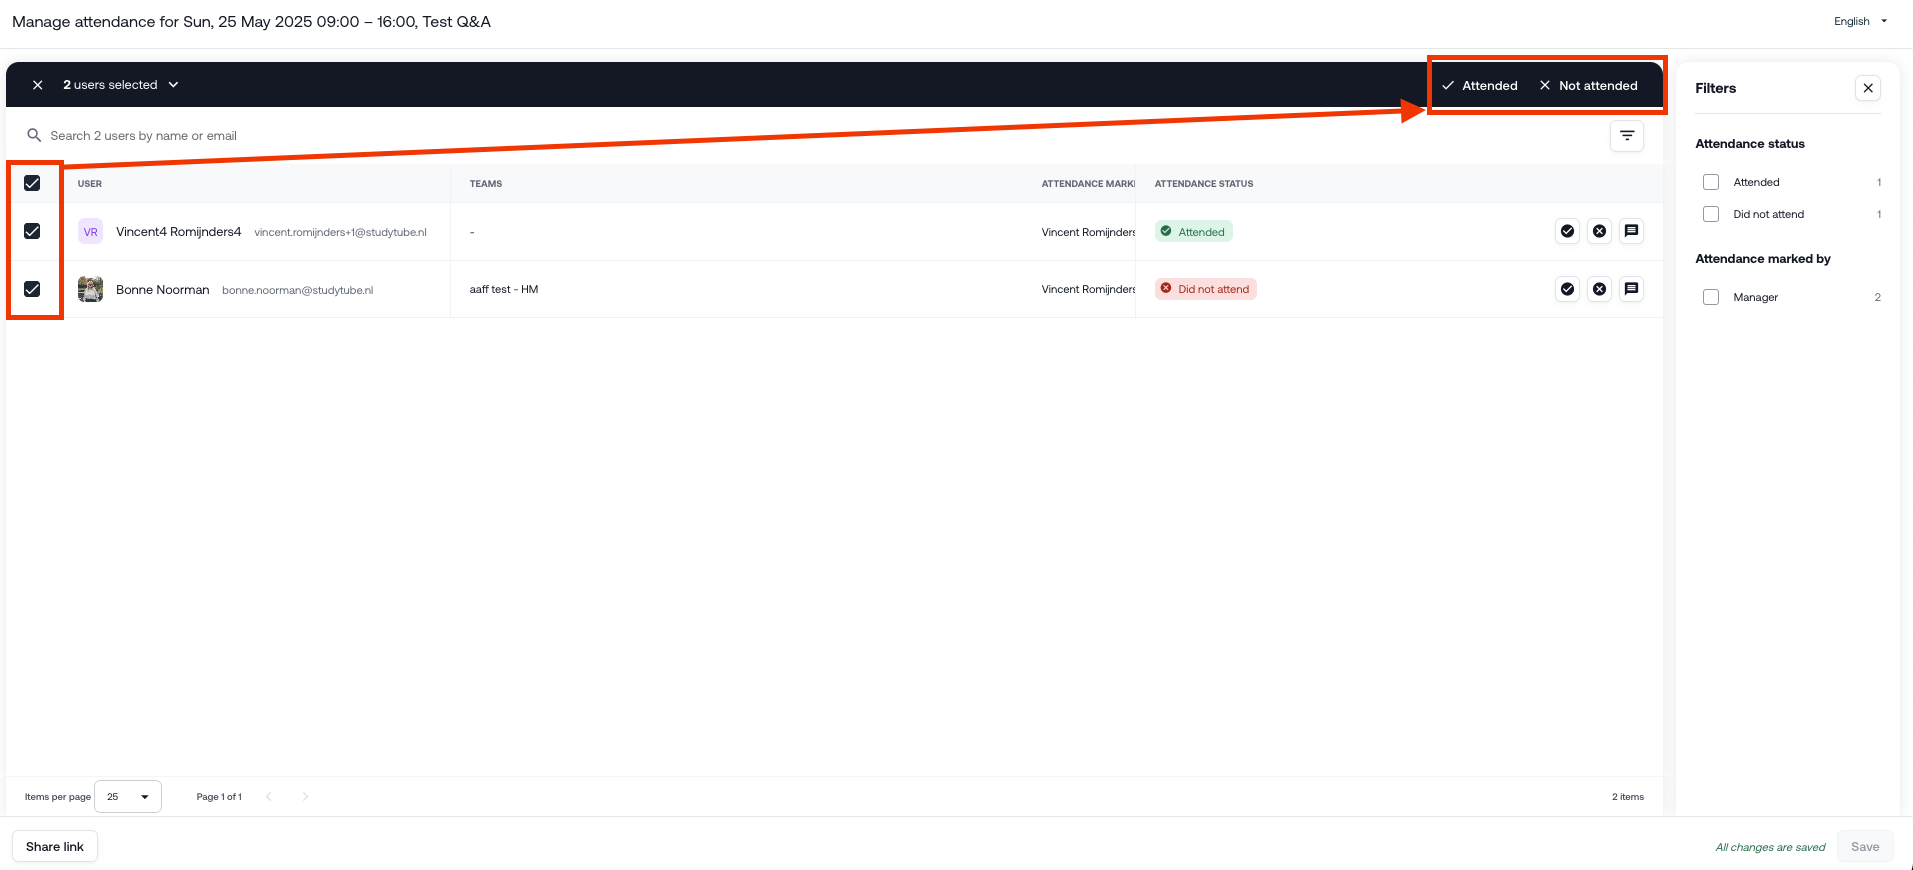
Click on “Manage date attendance”. A new tab will open where you can manage attendance per participant or select all participants at once. You can also add a note. You can make changes as long as the session is not yet completed.
As mentioned, managing attendance at the date level is not mandatory; however, if no action is taken, “Attendance not confirmed” will be shown in all event-related reports.
Having one date 
Having multiple dates
Adjustments per participant
Adjustments in bulk

At the session level:
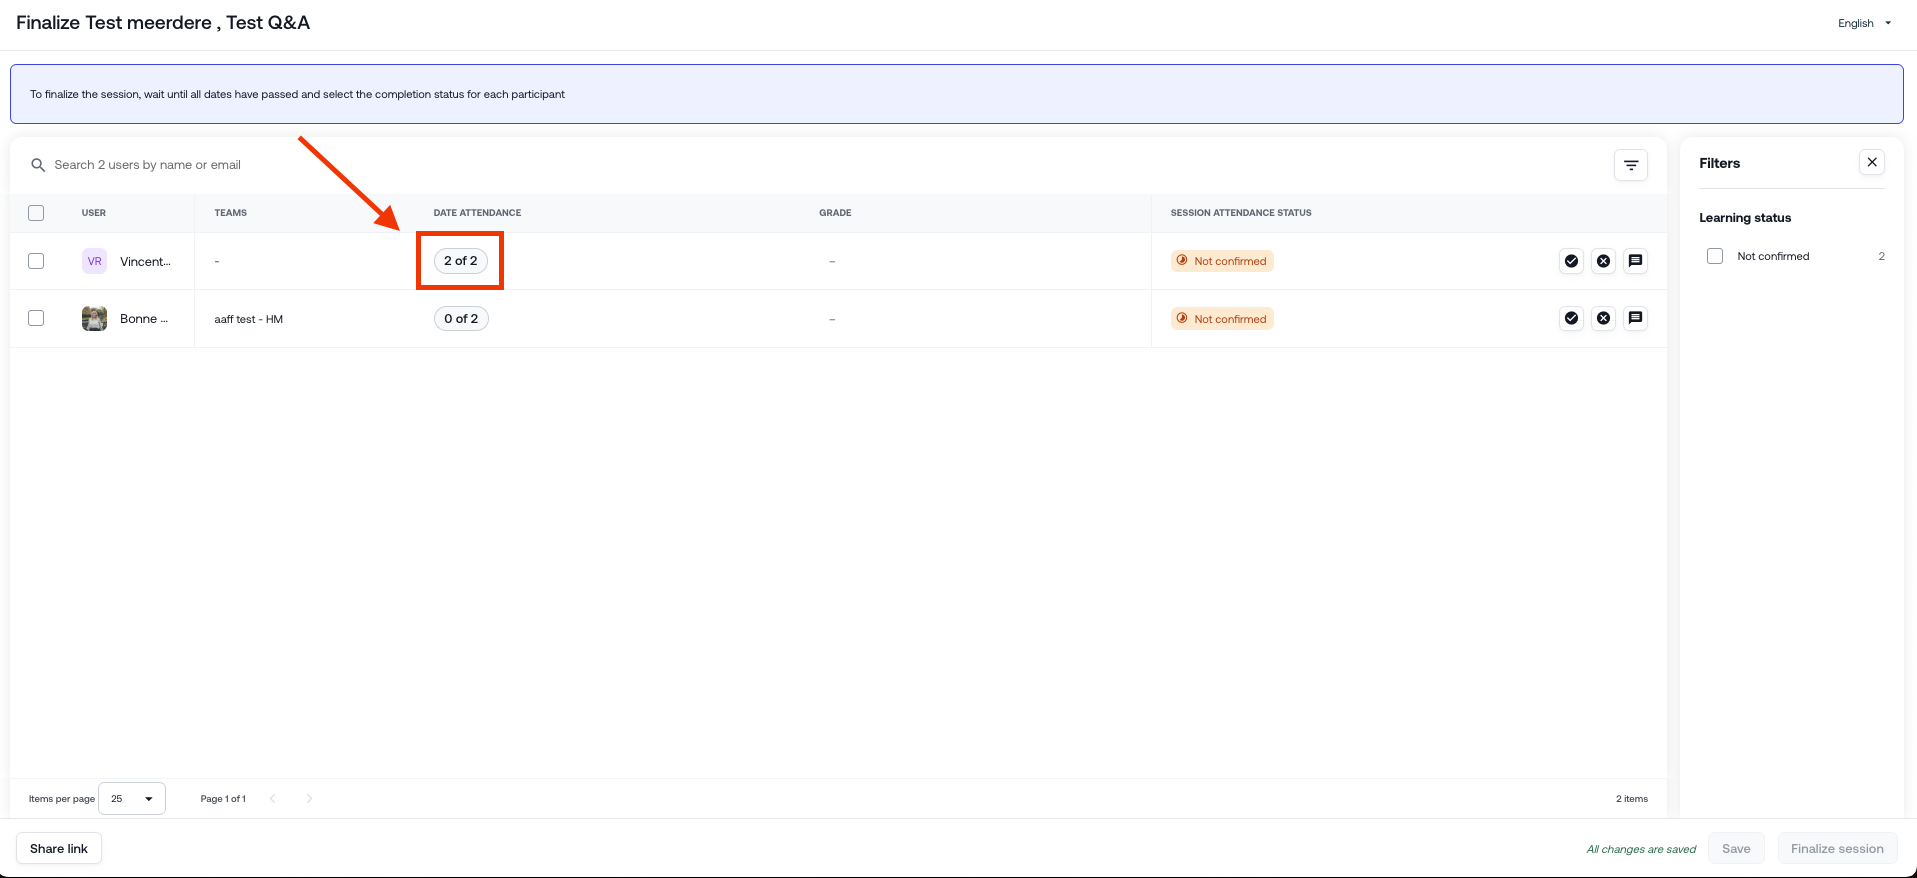
You can also view and adjust attendance registration at the session level (note: changes can only be made as long as the session is not closed or completed). To do this, click the icon in the "date attendance " column next to a participant (e.g., “2 of 2” in the example). A window will then appear on the right-hand side where you can see the attendance per date, who recorded it, and whether a note was added. In this window, you can also register or modify attendance if needed.


Option 2 (via a shareable link):
The second option is to share the participant list. In the screenshot below, this option can be found at the bottom left of the screen. This creates a shareable page where you or someone else can manage attendance. Copy and share the link with the individuals who need access to the participant list. This person does not need to be an actual user in the academy but will have the same options on the participant list as a user in the LMS.

Was this article helpful?
That’s Great!
Thank you for your feedback
Sorry! We couldn't be helpful
Thank you for your feedback
Feedback sent
We appreciate your effort and will try to fix the article
